How to Create a Seating Chart for Your Event
To create a seating chart, start with the room and the confirmed guest list, choose a layout that fits the event format, place tables or rows to scale, assign guests in groups, and then design the final chart so a guest can find a name or seat in seconds. For a banquet, that means a table plan. For a theatre, concert or conference session, it means a seat map with rows, sections and aisles. This guide covers both, with examples, a template checklist and advice on keeping the chart accurate after it goes out.
TL;DR
- Build the chart from the actual room: measured dimensions, fixed features, exits and aisles come first, names come last.
- Compile the chart after RSVPs or ticket sales are settled, then expect changes and plan how to update it.
- Pick the format that matches the event: table plan for dinners and galas, row-and-section seat map for theatres, concerts and conference sessions, general admission zones for standing crowds.
- Design for speed of reading: large table numbers, alphabetical lists for bigger groups, high contrast, and a second sign when there are many tables.
- For ticketed events, a seat map tied to ticketing prevents double-selling and replaces hand-assigned lists.
What an event seating chart is and when you need one
An event seating chart is a plan that shows where each guest or ticket holder sits. It takes two common forms:
- A table plan lists which guests are assigned to which table. It suits weddings, galas, fundraisers, awards dinners and conference lunches.
- A seat map shows every seat in a venue by section, row and number. It suits theatres, concert halls, comedy clubs and keynote rooms, and it is usually what ticket buyers pick from when they buy.
One event guide suggests a chart becomes worthwhile once the guest list passes about 50 people, because it cuts confusion and awkward clashes, and that assigned seating helps waitstaff know who receives which meal at a served dinner. The same guide advises compiling the chart after all RSVPs are in, not before. That timing rule applies to ticketed events too: build the structure early, but only finalize assignments once the numbers stop moving.
Below 50 guests with no meal service, an open seating plan is often enough. For a standing concert or a festival ground, you are planning zones and capacity rather than individual seats. If you are weighing the two approaches for ticket sales, our comparison of reserved seating vs general admission walks through the trade-offs.
What to gather before you start
Most seating charts go wrong because they begin with names. Begin with the room.
Room details
- Floor plan with dimensions. Ask the venue for a scaled plan, or measure it yourself. Note ceiling-height limits only if you plan staging or screens.
- Fixed features. Pillars, bars, stage, dance floor, buffet lines, AV desk, coat check, washrooms and doors all take space and block sightlines.
- Exits and aisles. Keep exit routes clear. Fire and building codes govern seating arrangements, and the rules differ by province and municipality. As an example, the Ontario Building Code requirements summarized in a theatre manager's guide include a limit of seven seats between any seat with a back and the nearest aisle, and a minimum clear passage between rows of fixed seats. Treat this as general guidance, not legal advice, and confirm the limits for your room with the venue and your local fire authority.
- Furniture inventory. Which tables and chairs does the venue supply, and in what sizes and quantities?
- Accessibility needs. Plan wheelchair spaces, companion seats and clear routes in the first draft, not as an afterthought. Spread accessible spaces across price levels and sections where the venue allows it.
Guest details
- A final or near-final guest list, with plus-ones counted.
- Groups that must sit together: families, departments, sponsors, a speaker's party.
- Constraints: dietary or meal choices at served dinners, mobility needs, VIPs, speakers and staff members who need quick exits.
- Contact route for changes: where guests will tell you about a late addition or a cancellation.
If your list lives in several spreadsheets, clean it up first. Our guest list management guide covers how to keep one reliable list for the whole event.
How to create a seating chart, step by step
1. Fix the capacity. Decide the maximum number of seats the room can hold with safe aisles, not the maximum that physically fits chairs. Subtract any seats you hold back for production, sponsors or staff.
2. Choose the layout style. Match the format to the event (see the examples below). The layout decides how many people fit and how they see or talk to one another.
3. Draw the room to scale. Use graph paper, a spreadsheet grid, a drawing tool or seating software. Place fixed features first, then stage and screens, then aisles, then tables or rows.
4. Size your tables. Round tables are generally planned at 8 to 10 seats, with a 60-inch round commonly seating 8 and a 72-inch round seating 10, according to one seating chart maker's planning notes. Confirm the real numbers with the venue's own tables, since chair style changes the fit.
5. Number or label everything. Give each table, section and row a clear label before you add a single name. Numbers that run logically across the room help guests and ushers find their way.
6. Seat anchors first. Place VIPs, speakers, hosts, sponsors and anyone with access needs. Their positions shape everything else.
7. Assign groups, then individuals. Seat families and teams together, then fill remaining seats. Mix people deliberately when you want networking, and separate them deliberately when you know there is friction.
8. Check the whole chart. Walk the chart as a guest would: from the entrance to the seat. Check sightlines, noise near speakers, and the path to washrooms.
9. Lock a version and share it. Date the version, name one person responsible for edits, and brief the check-in team and ushers.
Seating chart examples for different event formats
Banquet or gala, 120 guests
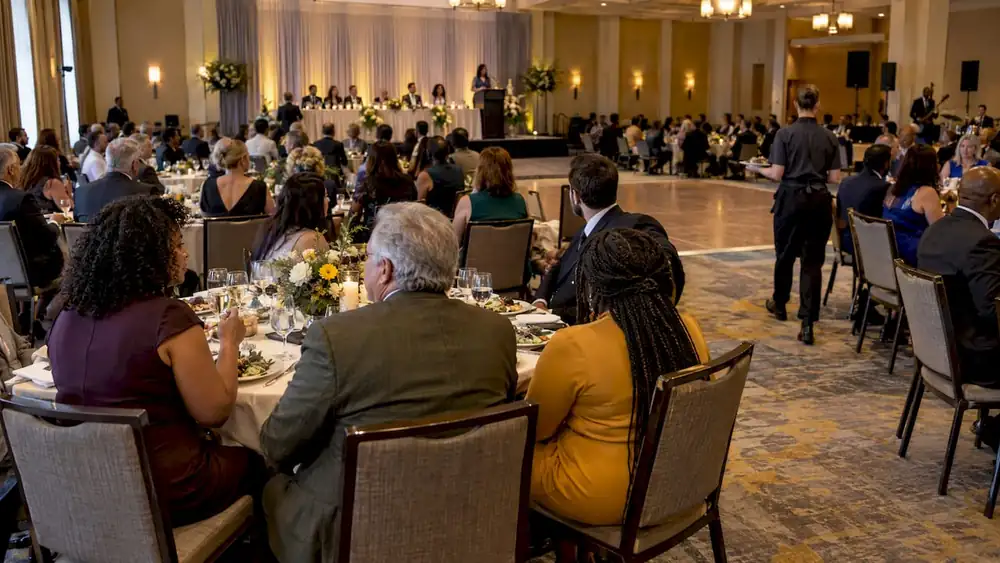
Twelve to fifteen round tables of 8 to 10, a head table or stage-facing VIP tables at the front, a dance floor or buffet kept clear of traffic. The chart is a table plan, with guests listed by name and table number. Seat sponsors close to the stage and keep the table nearest the kitchen doors for staff members or less sensitive groups.
Theatre-style conference session
Rows of chairs facing a stage with a centre aisle and two side aisles. Keep the front rows for speakers' guests and sponsors, leave wheelchair spaces at the end of rows with a companion seat next to each, and mark the seat range per section. This is a seat map, and attendees are often assigned by ticket type.
Concert hall or comedy club with reserved seats
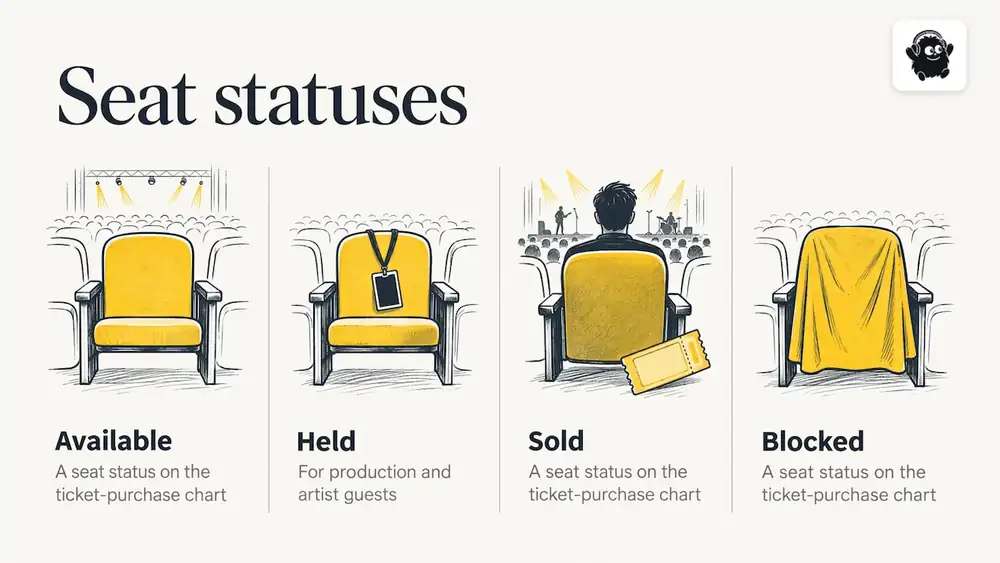
Sections by price level, rows lettered, seats numbered. The chart doubles as the ticket-purchase screen, so every seat needs a unique ID and a status: available, held, sold or blocked. Holds for production and artist guests should be set before sales open.
Trade show or expo
Strictly speaking this is a floor plan, not a seating chart, but the logic is the same: booths on a grid, wide main aisles, anchor exhibitors at far corners to pull traffic through the hall. Attendees seat themselves in sessions and meal areas, which can be general admission.
Festival with a main stage
General admission standing zones, a reserved or VIP platform, a seated accessible viewing area and a food court with tables. Capacity per zone matters more than named seats. Our guide to interactive venue maps shows how maps help attendees find zones and amenities.
Small workshop or classroom-style event
Tables in a U-shape or in clusters of 4 to 6, which supports group exercises. A simple numbered list is enough, and some organizers let participants pick their own table.
Choosing between table plans and seat maps
| Format | Best for | Unit you assign | Typical chart |
|---|---|---|---|
| Round-table banquet | Galas, fundraisers, weddings, awards | Guest to table | Table plan with name list |
| Theatre rows | Keynotes, concerts, comedy nights | Ticket to seat | Seat map by section and row |
| Classroom or U-shape | Workshops, training | Group to table | Table list |
| Standing or zones | Festivals, club nights | Ticket to zone | Zone map with capacities |
| Booth grid | Trade shows, markets | Exhibitor to booth | Floor plan |
Designing the chart so people can read it
A seating chart is a wayfinding tool. If guests cannot find their place in a few seconds, the design has failed, whatever it looks like.
- Sort for the crowd size. Listing guests alphabetically by last name is a standard approach for 80 or more guests, while listing by table suits groups of 60 or fewer or guests who arrive knowing their section. The same source covers both approaches in detail.
- Show the essentials. Guests should see the title, their name and the table assignment. Decorative graphics should not crowd the text, as one DIY guide puts it, edit the chart if guests cannot find names fast.
- Use full names and clear hierarchy. Table numbers should be readable before names are. Leave margins, favour contrast over prettiness, and check a proof at actual size and at arm's length, as this seating chart sizing guide recommends.
- Split instead of shrinking. When you run more than about 18 tables, the same guide advises two matching signs rather than smaller text, so the queue is halved.
- Provide a digital copy. A QR code at the entrance that opens a searchable list takes pressure off a printed board and updates instantly.
If you are printing a large board and ushers need a briefing sheet, an event-planning tool helps keep versions in one place. A roundup of project management tools for event planners can help you choose where RSVPs, tasks and the chart live together.
What a seating chart template should include
Whether you build one in a spreadsheet or use software, a usable template covers these fields:
- Event name, date, venue and the version date of the chart
- Room sketch with scale, exits, stage, fixed features and aisles
- Table or row labels and the seat count for each
- Guest name, party size, group or company, meal choice and access needs
- Seat status: assigned, held, reserved for staff, blocked for sightlines
- Notes column for last-minute changes and who approved them
- A contact for questions at the door
To adapt a template, change four things first: the capacity to match your room, the labelling to match your venue's numbering, the sort order to match your guest count, and the columns to match your catering or access needs. Delete anything decorative that does not help someone find a seat.
Sharing and updating the chart when things change
Attendance rarely holds still. People cancel, add guests and arrive in different groups than planned. A chart that cannot absorb changes becomes a problem on the day.
- Freeze a cut-off. Pick a date after which changes go through one person only. Announce it to the team.
- Keep one master. Print from the master, not from edited copies. Mark the version date on every printed board.
- Hold a few seats back. Leave a handful of unassigned seats or an extra table for late additions, within your safe capacity.
- Brief check-in staff members. Give the door team the final list and a plan for walk-ups. For larger events, the event check-in playbook shows how to move 1,000 people through quickly.
- Tell guests how to find their seat. For ticketed events, put the section, row and seat on the ticket and the confirmation email.
When the seating chart is also the ticket sale
If you sell tickets for specific seats, a hand-built chart stops being enough. Two buyers cannot be allowed to pick the same seat, held seats must be released correctly, and accessible seats must go to the people who need them. This is where a seat map builder linked to ticketing helps: the chart you design is the chart buyers choose from, and its status updates as tickets sell. Our rundown of the best ticketing platforms with reserved seating lists what to compare, and venues planning recurring programming may also want to read about season ticket management and box office software.
Our perspective
We see the same pattern across festivals, conferences, concerts and venue nights: the seating chart is not a separate task, it is one part of the run of the event. The seat map decides what attendees can buy, the same map tells the door team who should be where, and the same data tells you on the night how full the room is.
That is why we built Eventist as one system. Organizers can draw general admission and reserved seating with seat maps, sell from them, check people in by QR code from any phone, and take door sales with the built-in point of sale, without moving names between spreadsheets. Our team in Canada helps organizers set up their event, so the first chart does not have to be built alone.
Our advice stays simple: draw the real room, label it clearly, hold a few seats back and keep one master version. Do that and the chart supports the event instead of becoming another thing to fix at the door.
— Ciara
What it costs to sell seats through Eventist
If your seating chart feeds ticket sales, fees matter. Figures below are from our pricing page as of November 2026, for Canadian organizers:
- Event ticketing: $0.85 CAD per paid ticket
- Festivals and conferences: $4.99 CAD per paid ticket
- Competitions: $9.99 CAD per paid ticket
- Venues: 0.5% to 1.9% of what they charge on everything they sell, single tickets included, with no flat per-ticket fee
- Card processing fees are paid to Stripe or Square at their own rate, on top of the above
Free tickets and registrations run on monthly plans starting from $100 CAD per month, so a free-entry event is not free to run on the platform, though there is no per-ticket fee on free registrations. Paid ticketing has no monthly subscription.
Here is the arithmetic. Say you sell 1,000 tickets at $40 for an everyday ticketed event. At $0.85 per paid ticket, the platform fee is $850 CAD. A hypothetical percentage fee of 5% of ticket value would be $2,000 on the same sales. At that illustrative rate the flat fee comes to $1,150 less, which is why we say Eventist is usually cheaper for tickets priced above a few dollars. Your own comparison should use the actual rate and any added per-ticket charges of the platform you are considering, and card processing is separate in both cases.
If you want to see how seat maps, check-in and door sales work for your event type, the event ticketing page explains the flat-fee approach, and venues can read about venue management software.
Organizers who want help with setup can see the done-for-you options on our services page.
Common mistakes to avoid
- Starting with names instead of the room. You end up with a chart that does not fit.
- Ignoring aisles and exits. A chart that crams in extra seats can break venue and fire rules. This is general guidance, not legal advice, so check with the venue and the local authority.
- Over-designing the board. Decorative fonts and graphics slow people down.
- Publishing too early. Changes after printing mean reprints. Share a draft internally and a final version late.
- No plan for walk-ups. Decide where unexpected guests sit before the doors open.
- Forgetting staff and production. Reserve seats for staff members, camera positions and sound desks before you sell the rest.
Frequently Asked Questions
How many people should sit at each table?
Round tables are commonly planned for 8 to 10 guests, and a 60-inch round typically seats 8 while a 72-inch round seats 10. The real number depends on your chairs and table size, so ask the venue for its dimensions. Smaller groups of 6 to 8 support conversation better at networking events.
Do I need a seating chart for every event?
No. Open seating works for small events, standing concerts and casual meetups. A chart becomes useful for larger seated events, especially served dinners and ticketed shows where seats are reserved. Many organizers begin considering one once the list passes roughly 50 guests.
What is the best way to list guests on a seating chart?
Alphabetically by last name for larger groups, since guests find their names quickly, and by table number for smaller groups or when guests already know their section. Whichever you choose, use full names and large table numbers so the chart can be read from a distance.
When should I finalize the seating chart?
After RSVPs or ticket sales have settled, and before printing. Set a cut-off date, keep a single master version, and leave a few seats open for late changes within the room's safe capacity.
Can I make a seating chart for ticket sales online?
Yes. Ticketing software with a seat map builder lets you draw sections, rows and seats, mark holds and accessible spaces, and let buyers pick their seats. Compare how each platform handles holds, fees and check-in before choosing.
Sources
- Ontario Building Code guide for theatre managers
- Best Seating Arrangements, Party Hire Group
- Seating Chart DIY Guide, Eventoly
- Wedding Seating Chart Guide, Younique Gifts
- Wedding Seating Chart Wording, Paperlust
- Seating Chart Maker for Events and Weddings, Table-Plan
Recommended
Tags
Ready to simplify your events?
Join hundreds of organizers, studios, and festival directors who trust Eventist to run their events.